
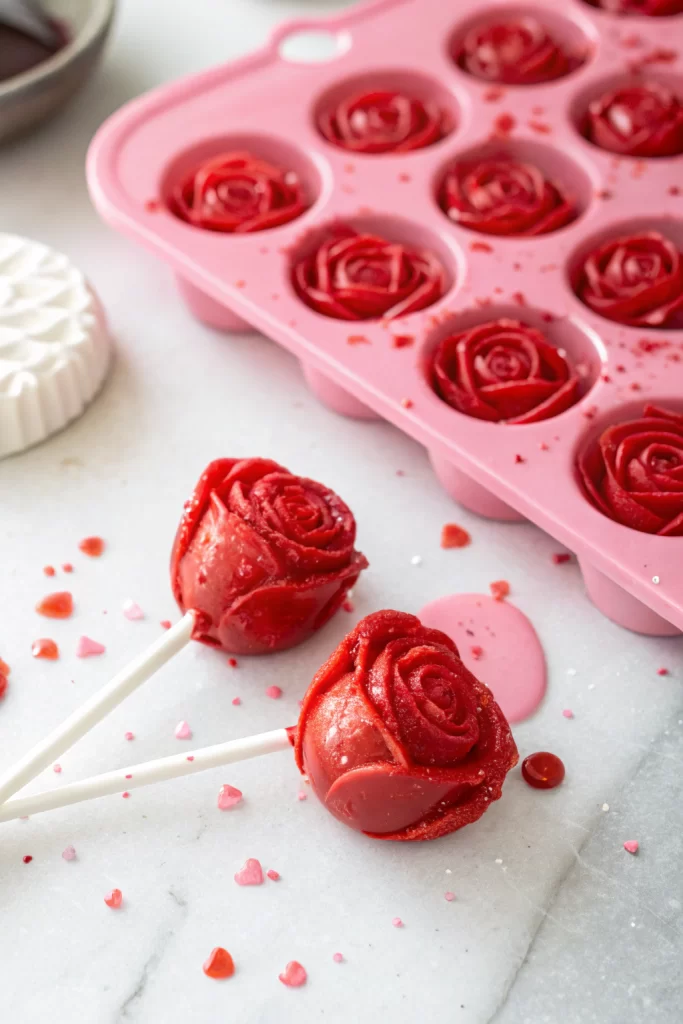
Marshmallows Blooming Roses Recipe tastes like a cross between a fluffy vanilla cloud and a chewy, toasted campfire treat, all dressed up as a bouquet. It suits anyone who loves pretty desserts that look fancy but only takes about 1 hour from start to finish. I tested this on my own kids and neighbors, and nobody believed I made them in my tiny American kitchen.
Why Make This Marshmallows Blooming Roses Recipe at Home
Homemade marshmallow roses taste fresher, softer, and more flavorful than anything from a bag. You control the sweetness, color, and size, so your bouquet can match birthdays, baby showers, or just a random Tuesday sugar craving.
You also skip weird textures from old store-bought marshmallows and get a fun kitchen project that kids and adults can build together. I treat these like edible crafts, which means you get dessert and a creative outlet in one go.
“These marshmallows blooming roses looked like a florist made them and tasted like the fluffiest vanilla clouds I ever ate.”
Ingredients You Need
You can make this Marshmallows Blooming Roses Recipe with simple pantry staples and a few candy-making helpers. I will list the base marshmallow, the rose assembly, and the tools you need.
Marshmallow Base
- 3 envelopes unflavored gelatin (about 2 1/2 tablespoons; I like Knox brand for consistent bloom)
- 1 cup cold water, divided (1/2 cup for blooming gelatin, 1/2 cup for syrup)
- 1 1/2 cups granulated sugar (standard white sugar works best)
- 1 cup light corn syrup (Karo or store brand both work; corn syrup keeps crystals away)
- 1/4 teaspoon fine sea salt
- 1 tablespoon pure vanilla extract (use real vanilla, not imitation, for deeper flavor)
- Optional: 1/4 teaspoon almond extract for a subtle floral note
- Gel food coloring in rose shades (soft pink, deeper pink, red; gel works better than liquid)
Coating & Decoration
- 1 cup powdered sugar
- 1/2 cup cornstarch
- Neutral oil or nonstick spray for greasing (canola, vegetable, or avocado oil)
- Extra gel food coloring for painting petal edges
- 1–2 teaspoons water or clear vanilla extract to thin food coloring for painting
Rose Assembly
You can shape these roses in two main ways: strips of marshmallow or piped marshmallow.
For strip roses (easier for beginners):
- 1 large rimmed baking sheet
- Parchment paper
- Sharp kitchen scissors or a pizza cutter
- Toothpicks or small wooden skewers
- Paper straws or lollipop sticks for stems
For piped roses (prettier, slightly trickier):
- Large piping bag
- Large closed star tip or petal tip (Wilton 1M, 2D, or 104 work well)
- Extra parchment squares or silicone mat
Equipment List
- Stand mixer with whisk attachment (strongly preferred) or a powerful hand mixer
- Medium to large heavy-bottomed saucepan
- Candy thermometer or instant-read thermometer that reads up to 250°F
- Rubber spatula (heatproof)
- Small offset spatula or butter knife
- Small bowls for mixing colors
- Clean kitchen towel and hot water for quick wipe-downs
Tips & Mistakes
- Use fresh gelatin; old packets lose strength and give droopy roses.
- Heat the syrup to 240°F (soft-ball stage); lower temps give sticky goo, higher temps give tough marshmallows.
- Start the mixer on low when you pour in hot syrup so you avoid sugar splatter and burned fingers.
- Whip the marshmallow until it turns thick, glossy, and holds soft peaks; under-whipped batter spreads, over-whipped batter sets in the bowl.
- Grease tools lightly; too much oil prevents marshmallow from sticking to itself and roses fall apart.
- Dust surfaces generously with the powdered sugar and cornstarch mix so marshmallow does not glue itself to your counter.
- Work in small batches; keep extra marshmallow in the bowl while you shape a few roses so it stays warm and workable.
- Cut strips with oiled scissors or a pizza cutter; dry blades pull and tear.
- Roll roses gently; tight rolling squeezes out air and makes dense centers.
- Let finished roses dry at room temperature for several hours so they hold shape and slice cleanly.
How to Make Marshmallows Blooming Roses Recipe
Step 1: Bloom the gelatin
Pour 1/2 cup cold water into the bowl of your stand mixer. Sprinkle the gelatin evenly over the surface so it hydrates without clumping. Let it sit for 10 minutes while you cook the syrup; the mixture will thicken and look like soft gel.
Step 2: Cook the sugar syrup
Add the remaining 1/2 cup water, granulated sugar, corn syrup, and salt to a saucepan. Stir once to combine, then clip on a candy thermometer and set the pan over medium heat. Cook without stirring until the syrup reaches 240°F; swirl the pan gently if needed to even out hot spots.
Step 3: Combine hot syrup and gelatin
Turn the mixer to low speed. Slowly pour the hot syrup in a thin stream down the side of the bowl so it meets the gelatin. Once you add all the syrup, increase the mixer to high speed.
Step 4: Whip the marshmallow
Whip the mixture on high for 8 to 12 minutes. The marshmallow should turn thick, white, and glossy, and the bowl should feel just slightly warm. Add vanilla and any almond extract in the last minute, then mix just until combined.
Step 5: Color the marshmallow base
Divide the marshmallow into 2 or 3 bowls if you want different rose shades. Tint each portion with gel food coloring, starting with a tiny amount and building up to your preferred pastel or bold pink. Stir quickly because the marshmallow starts to set as it cools.
Step 6: Prepare the coating and pan
Whisk powdered sugar and cornstarch together in a bowl. Line a rimmed baking sheet with parchment and dust it generously with the coating mix. Lightly oil a spatula and the sides of the pan to prevent sticking.
Step 7: Spread or pipe the marshmallow
For strip roses, spread the colored marshmallow into a roughly 1/2 inch thick layer on the coated pan. Smooth the top with an oiled spatula and dust the surface with more coating. Let it sit uncovered at room temperature for at least 4 hours, or overnight, until firm enough to cut.
For piped roses, fit a piping bag with your chosen tip and fill it with warm marshmallow. Pipe roses directly onto parchment squares or a silicone mat, starting from the center and spiraling outward. Let them dry at room temperature until the outside feels dry and holds shape.
Step 8: Cut strips for rolled roses
Dust a cutting board with the coating mix. Turn the marshmallow slab out onto the board and peel off the parchment. Dust the exposed side again, then cut long strips about 1 inch wide with oiled scissors or a pizza cutter.
Step 9: Shape the rose centers
Take one short piece of strip and roll it tightly to form the rose center. Pinch the bottom gently so it holds together. Skewer the base with a toothpick or lollipop stick to create a stem.
Step 10: Add petals and build the bloom
Wrap another strip around the center, slightly overlapping and flaring the top edge outward to mimic petals. Continue adding strips until the rose reaches your preferred size. Pinch and trim the base as needed, then dust lightly with more coating to prevent sticking.
Step 11: Paint and detail the petals
Mix a tiny drop of gel food coloring with a few drops of water or clear vanilla in a small bowl. Use a clean food-safe brush to add color to the petal edges or create gradient shading. Let the painted roses dry for 30 to 60 minutes so the surface sets.
Step 12: Dry and set the roses
Stand the roses upright in a foam block, a jar filled with rice, or a mug so they keep shape. Let them sit at room temperature for several hours, or overnight, until the exterior feels dry and slightly firm. Once set, gently brush off any excess coating.
Variations I’ve Tried
I swapped vanilla for rose water and added a tiny bit of lemon zest, which gave the marshmallows a light floral flavor that matched the rose shape perfectly. I also made chocolate marshmallow roses by adding 2 tablespoons of cocoa powder to the sugar mixture and using a deeper pink color for contrast. My kids voted for strawberry marshmallow roses, so I stirred in freeze-dried strawberry powder and used a soft blush pink color that looked like spring.
I tested mini rosebuds by cutting thinner strips and rolling just one or two layers, which worked great for cupcake toppers. I also made a rainbow bouquet with different colors in one batch by dividing the whipped marshmallow into several bowls and tinting each one separately.
How to Serve Marshmallows Blooming Roses Recipe
Serve these marshmallow roses on a platter as an edible bouquet centerpiece for birthdays, baby showers, or tea parties. Tuck one rose into a mug of hot chocolate or a latte-style drink for a dramatic melt-in-the-cup moment. Add them to frosted cakes or cupcakes instead of buttercream flowers when you want decoration that guests can peel off and snack on.
You can also wrap individual roses in clear treat bags with a ribbon and use them as party favors. Kids love them as a sweet surprise in lunchboxes or as rewards after homework.
How to store
- Keep marshmallows blooming roses in an airtight container at room temperature for 5 to 7 days; add a little extra coating mix at the bottom to prevent sticking.
- Avoid the fridge, since moisture can make the surface sticky and less pretty.
- Freeze roses in a single layer on a tray until firm, then transfer to a freezer bag and store for up to 1 month.
- Thaw at room temperature in the closed bag so condensation forms on the bag, not on the marshmallows.
- Refresh slightly sticky roses with a light dusting of the powdered sugar and cornstarch mix before serving.
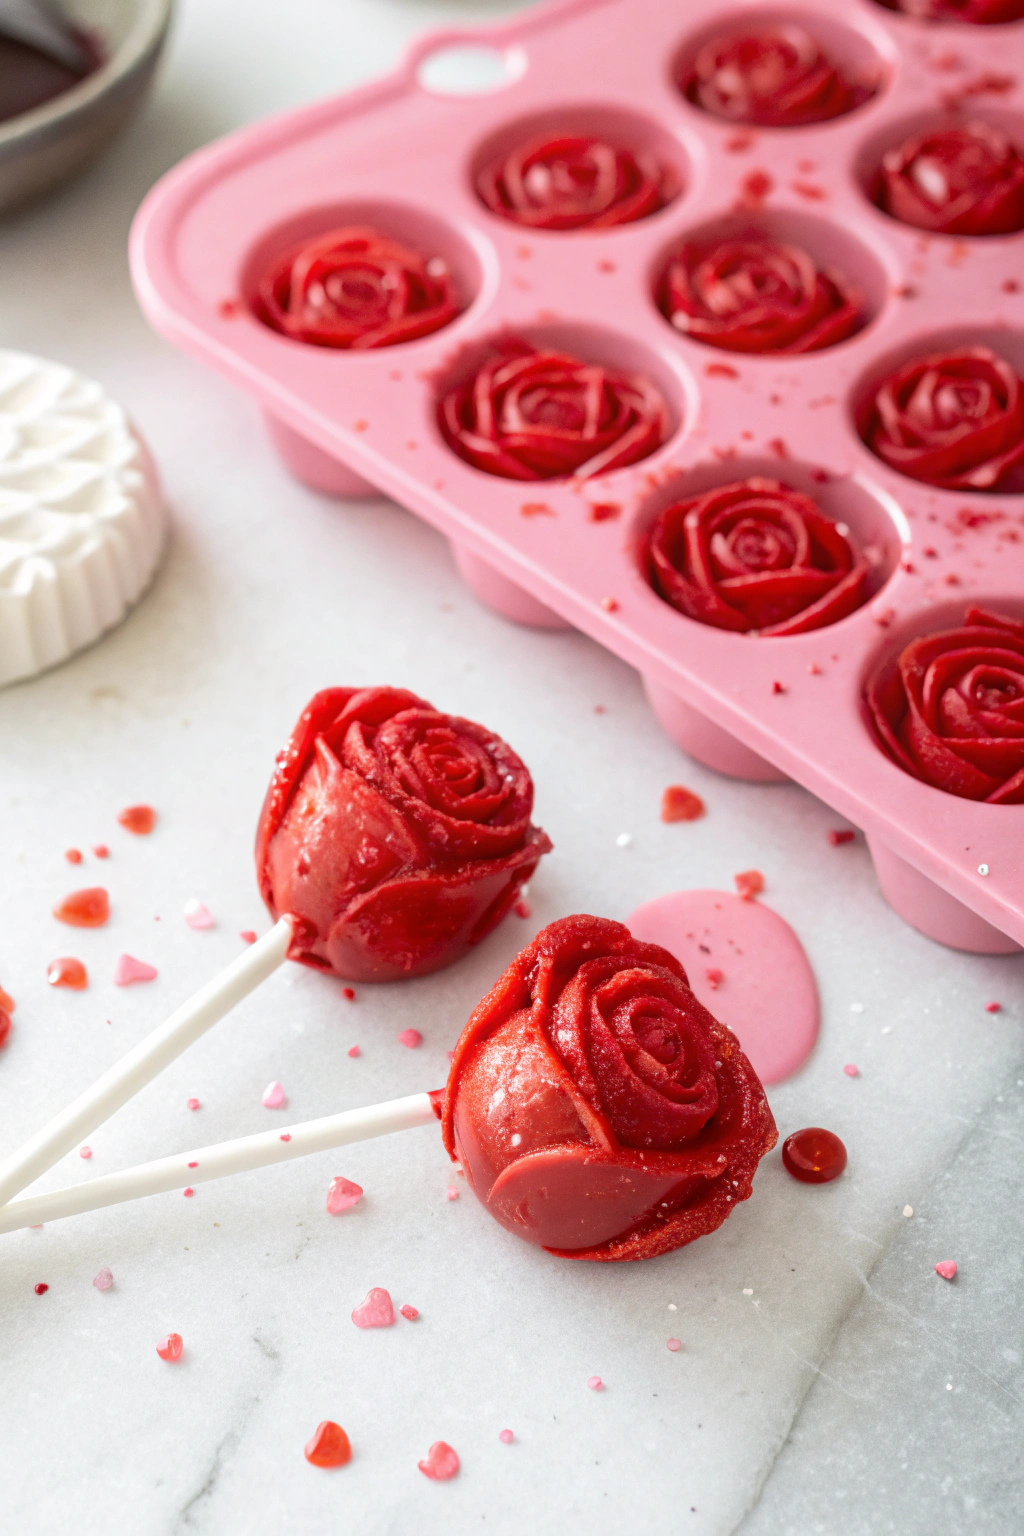
Marshmallows Blooming Roses Recipe
Ingredients
Instructions
- In a small bowl, sprinkle the powdered gelatin over 1/4 cup of cold water and let it sit for 5–10 minutes to bloom.
- In a saucepan, combine granulated sugar, corn syrup, and 1/2 cup water. Heat over medium, stirring until the sugar dissolves, then bring to a gentle boil without stirring. Cook until the mixture reaches about 240°F (soft-ball stage).
- Remove the syrup from heat and carefully stir in the bloomed gelatin until fully dissolved.
- Transfer the hot mixture to a mixing bowl. Add vanilla extract and a pinch of salt, then beat with a mixer on high speed for 8–10 minutes until thick, glossy, and tripled in volume. Add a few drops of food coloring at the end and mix briefly to tint the marshmallow.
- Dust a clean work surface or large silicone mat with a mixture of powdered sugar and cornstarch.
- Spread the marshmallow mixture into a thin, even layer on the dusted surface, about 1/4 inch thick. Let it sit at room temperature for 1–2 hours, or until firm enough to handle.
- Once set, dust the top lightly with more powdered sugar. Using a small round cutter or the rim of a tiny glass, cut circles of marshmallow.
- To form blooming roses, gently roll one marshmallow circle into a tight cylinder for the center. Wrap additional circles around it, overlapping slightly, to create petal layers, pinching at the base to secure each petal.
- Dust finished marshmallow roses lightly with powdered sugar to prevent sticking. Allow them to dry for another 30 minutes before serving or packaging.
Notes
Approximate per 1 marshmallow rose (1 of 12): 90 calories; fat 0 g; saturated fat 0 g; carbohydrates 23 g; fiber 0 g; sugars 21 g; protein 2 g; sodium 15 mg. Values will vary based on brands, exact size of the roses, and any additional decorations used.
Leave a Reply