
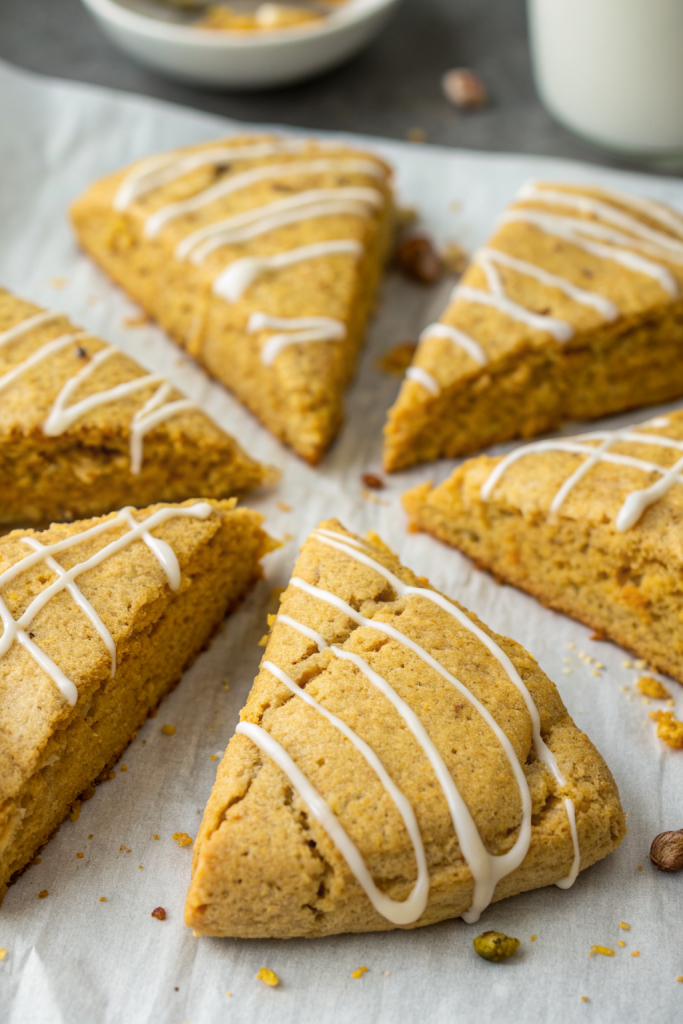
Healthy Pumpkin Scones Recipe with Maple Glaze tastes like a cozy fall morning in pastry form, with warm spices, tender crumb, and a sweet maple drizzle that feels like dessert but eats like breakfast. This recipe works well for busy home bakers who want a healthier treat on the table in about 40 minutes from start to finish. I tested these while my kid did homework at the kitchen counter, and we both agreed they beat store bakery scones by a mile.
Why Make This Healthy Pumpkin Scones Recipe with Maple Glaze at Home
You control the ingredients, so these pumpkin scones stay moist and tender without loads of butter and sugar. Whole grains, real pumpkin puree, and a light maple glaze keep them satisfying yet lighter than coffee shop versions.
You also skip mystery additives and oversized portions. You bake a batch on Sunday, enjoy one warm, then stash the rest for fast weekday breakfasts or snacks.
“These Healthy Pumpkin Scones with Maple Glaze taste bakery-level good, but feel way lighter and more satisfying for breakfast ★★★★★”
Ingredients You Need
Dry ingredients
- 1 cup white whole wheat flour
- 1 cup all-purpose flour
- 1 tablespoon baking powder
- 1 teaspoon ground cinnamon
- 1 teaspoon pumpkin pie spice
- ¼ teaspoon ground nutmeg
- ¼ teaspoon ground ginger
- ½ teaspoon fine sea salt
I like white whole wheat flour because it keeps the texture soft while still adding fiber. You can use all all-purpose flour if you prefer a more tender, cake-like scone. Use fresh baking powder so the scones rise well and stay fluffy.
Wet ingredients
- ⅓ cup cold unsalted butter, cut into small cubes
- ⅓ cup coconut sugar or light brown sugar, packed
- ¾ cup pumpkin puree (canned, not pumpkin pie filling)
- 1 large egg, room temperature
- 1 teaspoon vanilla extract
- 3 tablespoons plain Greek yogurt or thick plain yogurt
- 1–3 tablespoons milk of choice, as needed for dough (dairy or unsweetened almond or oat milk)
Use pure pumpkin puree and check the label to avoid added sugar or spices. I like Greek yogurt for extra protein and moisture without extra fat. Keep the butter very cold so you get nice flaky layers.
Maple glaze ingredients
- ¾ cup powdered sugar, sifted
- 2½–3 tablespoons pure maple syrup
- ½ teaspoon vanilla extract
- 1–2 teaspoons milk of choice, only if needed to thin
Pure maple syrup gives the glaze deep flavor, so skip pancake syrup. If the glaze looks too thick, add milk a few drops at a time until it drips slowly off a spoon. If it looks too thin, whisk in a spoonful of powdered sugar.
Optional mix-ins
- ⅓ cup mini dark chocolate chips
- ⅓ cup chopped toasted pecans or walnuts
- 2 tablespoons pepitas for sprinkling on top
Mini chocolate chips distribute better through the dough and keep each bite balanced. Toast nuts in a dry skillet for a few minutes to boost flavor. Pepitas on top add crunch and a bakery-style look.
Equipment list
- Large mixing bowl
- Medium mixing bowl
- Pastry cutter, fork, or clean fingertips
- Rubber spatula
- Bench scraper or sharp knife
- Parchment paper or silicone baking mat
- Baking sheet
- Cooling rack
- Small whisk for glaze
You can also use a food processor to cut the butter into the flour, but work quickly so the butter stays cold. A bench scraper helps shape and cut the dough neatly.
Tips & Mistakes
- Chill the butter and keep it cold so the scones bake up tall and flaky instead of flat and dense.
- Pat the dough gently and avoid overmixing so the texture stays tender and not tough.
- Measure flour by spooning it into the cup and leveling it, since packed flour makes dry, crumbly scones.
- Use pumpkin puree, not pumpkin pie filling, because added sugar and spices throw off the recipe.
- Start with less milk in the dough and add more by the teaspoon, since a slightly sticky dough bakes moist scones.
- Let the scones cool at least 10–15 minutes before glazing so the maple glaze sets instead of sliding off.
- Line the pan with parchment so the bottoms do not overbrown and cleanup stays easy.
- Do not crowd the baking sheet, because space between scones helps them rise and bake evenly.
How to Make Healthy Pumpkin Scones Recipe with Maple Glaze
Step 1: Mix the dry ingredients
Add the white whole wheat flour, all-purpose flour, baking powder, cinnamon, pumpkin pie spice, nutmeg, ginger, and salt to a large bowl. Whisk until everything looks evenly combined and no spice pockets remain. Set the bowl aside while you prep the wet ingredients.
Step 2: Cut in the cold butter
Add the cold butter cubes to the dry mixture. Use a pastry cutter or your fingertips to work the butter into the flour until you see pea-sized bits throughout. The mixture should look slightly sandy with visible small butter pieces.
Those butter bits create steam in the oven and give the scones a flaky texture. If the butter starts to soften, place the bowl in the fridge for 5–10 minutes. Cold dough bakes into better scones.
Step 3: Whisk the pumpkin mixture
In a separate medium bowl, whisk together pumpkin puree, coconut sugar, egg, vanilla, and Greek yogurt. Whisk until the mixture looks smooth and glossy. Taste a tiny bit and adjust spices if you prefer more cinnamon or pumpkin pie spice.
If the mixture feels very thick, add 1 tablespoon of milk and whisk again. The mixture should pour slowly, not run like water. Set it near the flour mixture.
Step 4: Bring the dough together
Pour the pumpkin mixture into the flour and butter bowl. Use a rubber spatula to fold the wet and dry ingredients together until they just combine. If the dough looks too dry and crumbly, drizzle in milk 1 tablespoon at a time and fold again.
Stop mixing when no dry flour streaks remain and the dough feels slightly sticky but holds together. If you add chocolate chips or nuts, fold them in gently at this point. Overworking the dough makes the scones tough, so keep it brief.
Step 5: Shape the scone dough
Lightly flour a clean work surface and turn the dough out onto it. Gently pat and nudge the dough into a round about 7–8 inches wide and about 1 inch thick. Use your hands instead of a rolling pin so you keep the texture soft.
Use a bench scraper or sharp knife to cut the round into 8 equal wedges. Transfer each wedge to a parchment-lined baking sheet, spacing them at least 2 inches apart. If the dough feels warm or soft, chill the tray in the fridge for 10–15 minutes.
Step 6: Bake the scones
Heat your oven to 400°F while the scones chill. Brush the tops lightly with milk for a bit of shine and color. You can sprinkle a tiny pinch of coconut sugar on top for a subtle crunch.
Bake the scones for 15–18 minutes, until the tops look set and lightly golden and a toothpick in the center comes out clean or with a few moist crumbs. The edges should feel firm but not hard. Place the baking sheet on a cooling rack and let the scones cool at least 10 minutes.
Step 7: Mix the maple glaze
While the scones cool, add powdered sugar, maple syrup, and vanilla to a small bowl. Whisk until smooth and thick but pourable. If the glaze looks too thick, add milk a few drops at a time and whisk again.
If it looks too thin, sprinkle in a bit more powdered sugar and whisk. The glaze should fall off the whisk in slow ribbons. Taste and adjust with a pinch of salt if you like a sweet-salty finish.
Step 8: Glaze the scones
Place the slightly cooled scones on a cooling rack set over the baking sheet. Use a spoon to drizzle the maple glaze over each scone in zigzags or lines. You can also dip the tops directly into the glaze for a thicker coating.
While the glaze stays wet, sprinkle on pepitas, chopped nuts, or a tiny pinch of cinnamon if you want extra flair. Let the glaze set for 10–15 minutes before serving. The maple glaze firms up but still tastes soft and sweet when you bite in.
Variations I've Tried
I swapped half the flour for oat flour once, and the scones turned extra tender with a slightly nutty flavor. If you try that, keep a closer eye on the milk since oat flour absorbs more liquid.
I also made a version with mini dark chocolate chips and chopped pecans, which turned the scones into a dessert-style treat. Another favorite variation uses a light orange zest glaze instead of maple, which brightens the pumpkin flavor and adds a citrus twist.
How to Serve Healthy Pumpkin Scones Recipe with Maple Glaze
Serve these Healthy Pumpkin Scones with Maple Glaze slightly warm with a mug of hot coffee, chai, or herbal tea. Add a side of Greek yogurt and fresh fruit for a more filling breakfast. Kids enjoy them with a glass of cold milk or warm spiced apple cider.
You can also slice a cooled scone in half and toast it lightly, then drizzle on a little extra maple syrup or nut butter. The edges crisp up and the inside stays soft and tender.
How to store
- Store leftover scones at room temperature in an airtight container for up to 2 days; place a paper towel inside to absorb moisture.
- Keep scones in the fridge for up to 5 days if your kitchen runs warm; warm them in a low oven at 300°F for 5–8 minutes or in the microwave for about 10–15 seconds.
- Freeze unglazed scones in a single layer, then transfer them to a freezer bag for up to 2 months; thaw at room temperature and warm in the oven before glazing.
- Freeze glazed scones on a tray until solid, then store in a container with parchment between layers; reheat briefly in the oven at 275°F until just warm so the glaze softens but does not melt off.