

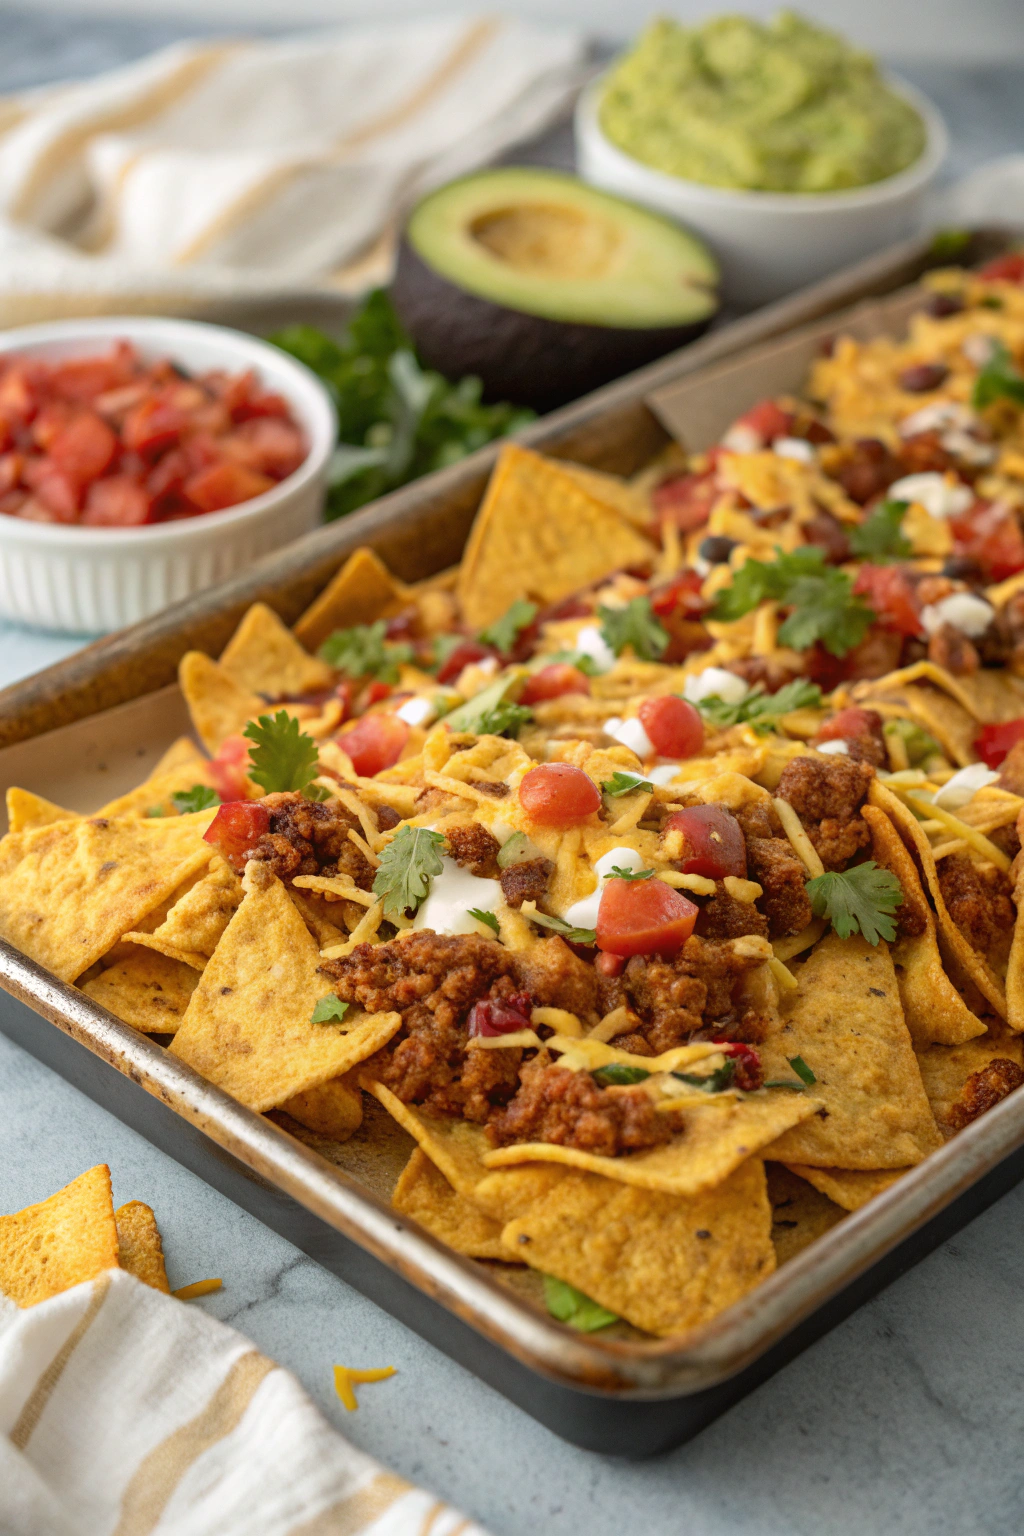
Loaded Nachos Recipe hits every craving at once: crunchy, cheesy, saucy, and just a little messy in the best way. This version works for busy weeknights, game day spreads, or last‑minute movie snacks and comes together in about 30 minutes. I first threw these together after a long shift in a restaurant kitchen, and they still feel like my favorite “chef snack” that happens to feed a crowd.
Why Make This Loaded Nachos Recipe at Home
Homemade loaded nachos taste fresher, stay crisp longer, and carry way more toppings than most restaurant versions. You control everything: spice level, cheese pull factor, and how generous you feel with the guac.
You also save money and use pantry ingredients you probably already own. Once you learn this method, you can clean out your fridge and turn random leftovers into a tray of nachos that looks intentional and restaurant level.
“These nachos taste like the best sports bar platter, only hotter, cheesier, and loaded exactly how you want.”
Ingredients You Need
Tortilla chips and base
- Tortilla chips: Use thick, sturdy chips labeled “restaurant style” so they hold toppings without turning soggy. Avoid super thin chips because they break under cheese and beans.
- Oil spray or a light brush of neutral oil (optional): Helps chips stay crisp under toppings. I like avocado or canola oil.
Cheese layer
- Shredded cheese, about 3 cups total:
- Use a blend of sharp cheddar and Monterey Jack or pepper Jack for melt and flavor.
- Shred from a block when possible because bagged shreds often contain anti-caking starch that melts less smoothly.
- Use a Mexican blend if you want a shortcut.
Protein options
Pick one or mix a couple. Aim for about 2 cups cooked total.
- Ground beef (80–90% lean): Classic choice for loaded nachos.
- Ground turkey or chicken: Lighter option that still tastes great with spices.
- Shredded rotisserie chicken: Fast shortcut when you do not want to cook meat from scratch.
- Canned black beans or pinto beans, drained and rinsed: Great vegetarian base and pantry hero.
- Refried beans: Spreadable layer that keeps chips crisp under toppings.
Veggies and toppings
- Yellow or white onion, finely diced: Adds sweetness and bite.
- Bell pepper, diced (any color): Adds crunch and color.
- Fresh jalapeños, thinly sliced: Use seeds for more heat, remove them for milder nachos.
- Tomatoes, diced: Roma or grape tomatoes hold shape best.
- Corn kernels (fresh, frozen, or canned): Adds sweetness and texture.
- Black olives, sliced (optional): Classic topping that adds briny flavor.
- Green onions, thinly sliced: Sprinkle on at the end for freshness.
- Fresh cilantro, chopped: Adds brightness; skip if you dislike it.
Sauces and flavor boosters
- Salsa: Use your favorite jarred salsa or restaurant style salsa from the refrigerated section. Thicker salsa keeps chips crisper.
- Hot sauce: Adjust to your heat tolerance.
- Taco seasoning: Use a packet for convenience or mix chili powder, cumin, smoked paprika, garlic powder, onion powder, oregano, salt, and pepper.
- Salt and pepper: Season each layer lightly so flavors pop.
Cool toppings
Add these after baking.
- Sour cream or plain Greek yogurt: Greek yogurt works as a lighter, higher protein swap.
- Guacamole or sliced avocado: Store-bought guac works fine on busy nights.
- Lime wedges: A squeeze of lime brightens everything.
Equipment
- Large rimmed baking sheet or sheet pan
- Parchment paper or foil for easier cleanup
- Large skillet for cooking protein and veggies
- Cutting board and sharp knife
- Cheese grater if shredding blocks
- Tongs or spatula for layering and serving
Tips & Mistakes
- Spread chips in a single, slightly overlapping layer so cheese melts between them and every chip gets toppings.
- Build two lighter layers of chips and toppings instead of one mountain so the middle does not turn soggy.
- Warm refried beans with a splash of water or broth so they spread easily and do not clump.
- Season meat and beans generously with taco seasoning so the nachos taste bold, not bland.
- Drain canned beans and corn well so extra liquid does not soak the chips.
- Use freshly shredded cheese when possible so it melts smoothly and stretches nicely.
- Bake at a high temperature (around 400–425°F) so cheese melts quickly and chips stay crisp.
- Add fresh toppings like tomatoes, cilantro, and sour cream after baking so they stay bright and cool.
- Do not walk away from the oven; nachos can go from perfect to overdone in a couple of minutes.
- Serve right away because nachos taste best hot and crisp, not after a long sit on the counter.
How to Make Loaded Nachos Recipe
Step 1: Sauté veggies and aromatics
Heat a tablespoon of oil in a large skillet over medium heat. Add diced onion and bell pepper and cook until soft and lightly golden, about 6 to 8 minutes. Stir in minced garlic and jalapeño, then cook 1 to 2 minutes until fragrant. Season with a pinch of salt and pepper.
Step 2: Cook and season the protein
Add ground beef, turkey, or chicken to the skillet with the veggies. Break it up with a spoon and cook until browned and no pink remains, about 6 to 8 minutes. Sprinkle in taco seasoning and a splash of water, then stir and simmer 2 to 3 minutes until the mixture thickens and tastes well seasoned. Taste and adjust salt, hot sauce, or spices.
If you use shredded chicken or only beans, stir them into the sautéed veggies with taco seasoning and a little water. Simmer a few minutes so flavors blend and the mixture thickens slightly.
Step 3: Prep the beans and oven
Preheat your oven to 400°F (200°C). Line a rimmed baking sheet with parchment or foil. Warm refried beans in a small saucepan with a splash of water or broth until smooth and spreadable. Stir in a spoonful of salsa or taco seasoning if you want extra flavor.
Step 4: Build the first layer
Spread half the tortilla chips on the baking sheet in a mostly even layer. Drizzle or dollop half the refried beans over the chips. Spoon half the meat and veggie mixture over that, then sprinkle with half the shredded cheese. Scatter some corn, black beans, and olives over the top.
Step 5: Build the second layer
Repeat with another layer of chips, refried beans, meat mixture, cheese, and remaining corn, beans, and olives. Keep toppings fairly even so every scoop tastes balanced. Lightly spray the top with oil if you want extra crisp edges on the chips.
Step 6: Bake until melty and golden
Place the sheet pan in the hot oven. Bake 8 to 12 minutes until the cheese melts completely and starts to bubble and lightly brown at the edges. Keep an eye on it near the end so the cheese does not overcook.
Step 7: Add fresh toppings and serve
Remove the nachos from the oven and let them sit 2 to 3 minutes so the cheese sets slightly. Top with diced tomatoes, green onions, cilantro, dollops of sour cream or Greek yogurt, and spoonfuls of guacamole. Finish with a squeeze of lime juice and a few shakes of hot sauce. Serve straight from the pan while everything tastes hot and gooey.
Variations I’ve Tried
- Fully vegetarian loaded nachos: Skip meat and double the beans, then add extra veggies like sautéed mushrooms or zucchini. I also like a drizzle of chipotle Greek yogurt sauce on top.
- Chicken fajita nachos: Use sliced cooked chicken with sautéed onions and bell peppers seasoned like fajitas. Add extra lime and cilantro at the end.
- Breakfast nachos: Use scrambled eggs, breakfast potatoes, black beans, and cheese, then top with salsa and avocado. Kids usually attack this version on weekend mornings.
- BBQ pulled chicken or pork nachos: Toss cooked shredded meat with barbecue sauce, layer with cheese and corn, then top with a little shredded lettuce and a drizzle of ranch or yogurt sauce.
- Extra spicy nachos: Use pepper Jack cheese, pickled jalapeños, hot salsa, and a few dashes of your favorite hot sauce over the top.
How to Serve Loaded Nachos
Serve this Tasty Loaded Nachos Recipe straight from the hot sheet pan so everyone can reach in and grab their favorite corner. I like to set out extra bowls of salsa, guacamole, and sour cream on the side so people can customize each bite. Pair the nachos with a simple green salad, fruit salad, or a side of rice and beans to round out the meal. A big pitcher of iced tea, lemonade, or sparkling water with lime fits perfectly.
How to store
- Short term storage: Transfer leftover nachos to an airtight container and keep in the fridge up to 2 days.
- Freezer: Nachos do not freeze well once assembled, but you can freeze the cooked meat and bean mixture for up to 3 months and use it later for faster nachos.
- Best reheating method: Spread leftovers on a baking sheet and reheat in a 375°F oven for 8 to 10 minutes until hot and crisp again.
- Microwave option: Use the microwave only for small portions and expect softer chips; add a quick 2 to 3 minute blast under the broiler if you want some crunch back.
Tasty Loaded Nachos Recipe
Ingredients
Instructions
- Preheat the oven to 375°F (190°C). Line a large baking sheet with parchment paper or lightly grease it.
- In a skillet over medium heat, cook the ground beef, breaking it up with a spatula, until browned and cooked through. Drain excess fat if necessary.
- Add taco seasoning and water to the skillet. Stir and simmer for 3–4 minutes, until the sauce thickens and coats the meat. Remove from heat.
- Spread the tortilla chips evenly over the prepared baking sheet, creating a single, slightly overlapping layer.
- Sprinkle the seasoned beef evenly over the chips, followed by black beans and corn if using.
- Top with the shredded cheddar and Monterey Jack cheeses, distributing evenly over the entire tray.
- Bake for 8–10 minutes, or until the cheese is fully melted and bubbly.
- Remove from the oven and immediately top with diced tomatoes, black olives, jalapeños, green onions, and cilantro.
- Dollop sour cream and guacamole over the nachos or serve them on the side for dipping.
- Serve hot and enjoy the nachos straight from the pan while the cheese is still melty.
Notes
Approximate per serving (1/6 of recipe): 520 calories; fat 30 g; saturated fat 13 g; carbohydrates 42 g; fiber 5 g; sugars 3 g; protein 22 g; sodium 980 mg. Values will vary based on exact brands, toppings, and portion sizes.
Leave a Reply