
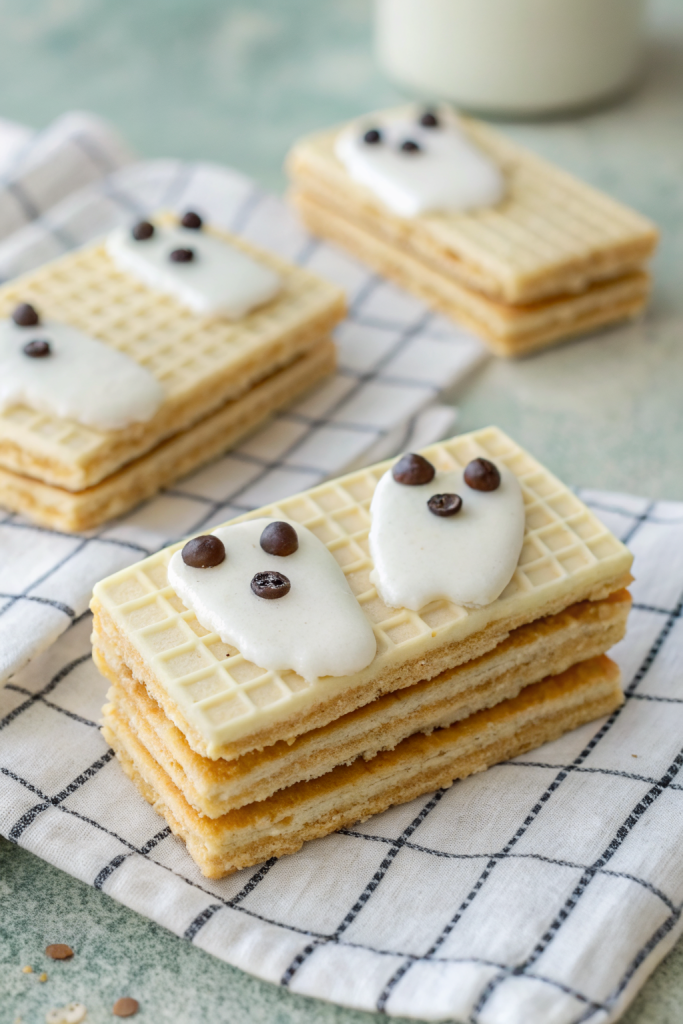
Chocolate Dipped Ghost Wafer Cookies Recipe tastes like a crunchy vanilla cookie hugged by creamy white chocolate with just enough spooky charm to make kids squeal and adults “taste test” half the batch. This recipe works perfectly for busy parents, Halloween parties, bake sales, or anyone who wants a cute dessert in under 45 minutes from start to finish. I first made these with my niece, and we laughed so hard at our lopsided ghosts that they instantly became a yearly tradition.
Why Chocolate Dipped Ghost Wafer Cookies Recipe Is Worth It
You get a bakery-level Halloween treat with almost zero baking skills required, since the base uses store-bought vanilla wafer cookies. The chocolate shell adds a rich, creamy bite, while the wafer stays crisp and light, so you never feel like you ate a sugar brick.
These ghost wafer cookies decorate easily, travel well, and kids can help with every step. You also customize them with different chocolates, sprinkles, and faces, so each ghost shows off its own little cookie personality.
“These Chocolate Dipped Ghost Wafer Cookies disappeared from the party table in ten minutes flat and everyone asked for the recipe ★★★★★”
Ingredients You Need
Cookie & Chocolate Base
- 1 (11–12 oz) package rectangular vanilla wafer cookies
- Use any brand of plain vanilla wafers or sugar wafers without filling.
- Choose a sturdy cookie so it holds up to dipping.
- 12 oz white chocolate chips or white candy melts
- Candy melts coat more smoothly and set faster.
- Use white baking bars if you want a smoother, richer flavor.
- 1–2 tsp neutral oil (coconut, canola, or vegetable)
- This helps the chocolate thin out and coat the cookies evenly.
Ghost Faces & Decorations
- 1/4 cup mini chocolate chips
- Use these for eyes or mouths.
- 2–3 tbsp chocolate sprinkles or mini chocolate jimmies
- Great for quick eyes if you do not want to pipe.
- 1–2 oz dark or milk chocolate, melted, for piping faces
- Use chocolate chips or a baking bar.
- Optional: black gel icing or edible marker
- These work well if you want super defined faces.
- Optional: Halloween sprinkles (orange, purple, black)
- Sprinkle around the base of the ghost for extra color.
Pantry Shortcuts & Substitutions
- Swap vanilla wafers with shortbread fingers or ladyfingers for a different texture.
- Use almond bark or vanilla candy coating instead of white chocolate chips if you want a thicker shell.
- Choose dairy-free white chips for a vegan version and pair them with vegan-friendly cookies.
- Use pre-made candy eyeballs if you want the fastest decorating route.
Equipment List
- Microwave-safe bowl or heatproof bowl for double boiler
- Baking sheet lined with parchment paper or silicone mat
- Fork or dipping tool for coating cookies
- Small piping bag or zip-top bag (snip a tiny corner) for chocolate faces
- Toothpicks for detail work and chocolate clean-up
- Cooling rack (optional, but handy)
- Small bowls for toppings and decorations
Quick Tips & substitutions
- Melt white chocolate slowly in 20–30 second bursts in the microwave and stir well after each burst to avoid scorching.
- Add 1 teaspoon of oil at a time to thin the chocolate; stop when it flows smoothly off a spoon.
- Keep cookies at room temperature and dry before dipping so the chocolate clings well.
- Chill dipped cookies on a parchment-lined sheet for 10–15 minutes so the coating sets quickly and stays shiny.
- Use candy melts if white chocolate chips seize or clump on you often.
- Swap vanilla wafers with gluten-free vanilla cookies for a gluten-free batch.
- Use dairy-free white chips and dark chocolate for faces to keep everything vegan-friendly.
- Keep decorations simple for kids: mini chocolate chips for eyes and a single sprinkle for the mouth.
- Work in small batches so the chocolate stays fluid and does not thicken while you decorate.
- If chocolate thickens, warm it again for 10–15 seconds and stir until smooth.
How to Make Chocolate Dipped Ghost Wafer Cookies Recipe
Step 1: Set up the cookie station
Line a baking sheet with parchment paper or a silicone mat.
Arrange vanilla wafer cookies in a single layer near the baking sheet so you move quickly once you melt the chocolate.
Pour mini chocolate chips, sprinkles, and any candy eyes into small bowls for easy access.
Step 2: Melt the white chocolate
Place white chocolate chips or candy melts in a microwave-safe bowl.
Microwave on 50% power in 20–30 second bursts, stirring well after each burst, until the chocolate looks mostly melted and smooth.
Stir in 1 teaspoon of neutral oil and mix until the chocolate flows easily; add a second teaspoon only if the mixture still feels too thick.
Step 3: Dip the wafer cookies
Hold one wafer cookie at a time over the bowl and either dip it fully or spoon chocolate over it until you coat it.
Use a fork to lift the cookie, tap the fork gently on the bowl edge to shake off extra chocolate, and scrape the bottom of the fork on the bowl rim.
Lay the coated cookie on the prepared baking sheet and shape the chocolate at the bottom with a spoon or toothpick to give your ghost a little wavy “sheet” edge.
Step 4: Add ghost faces
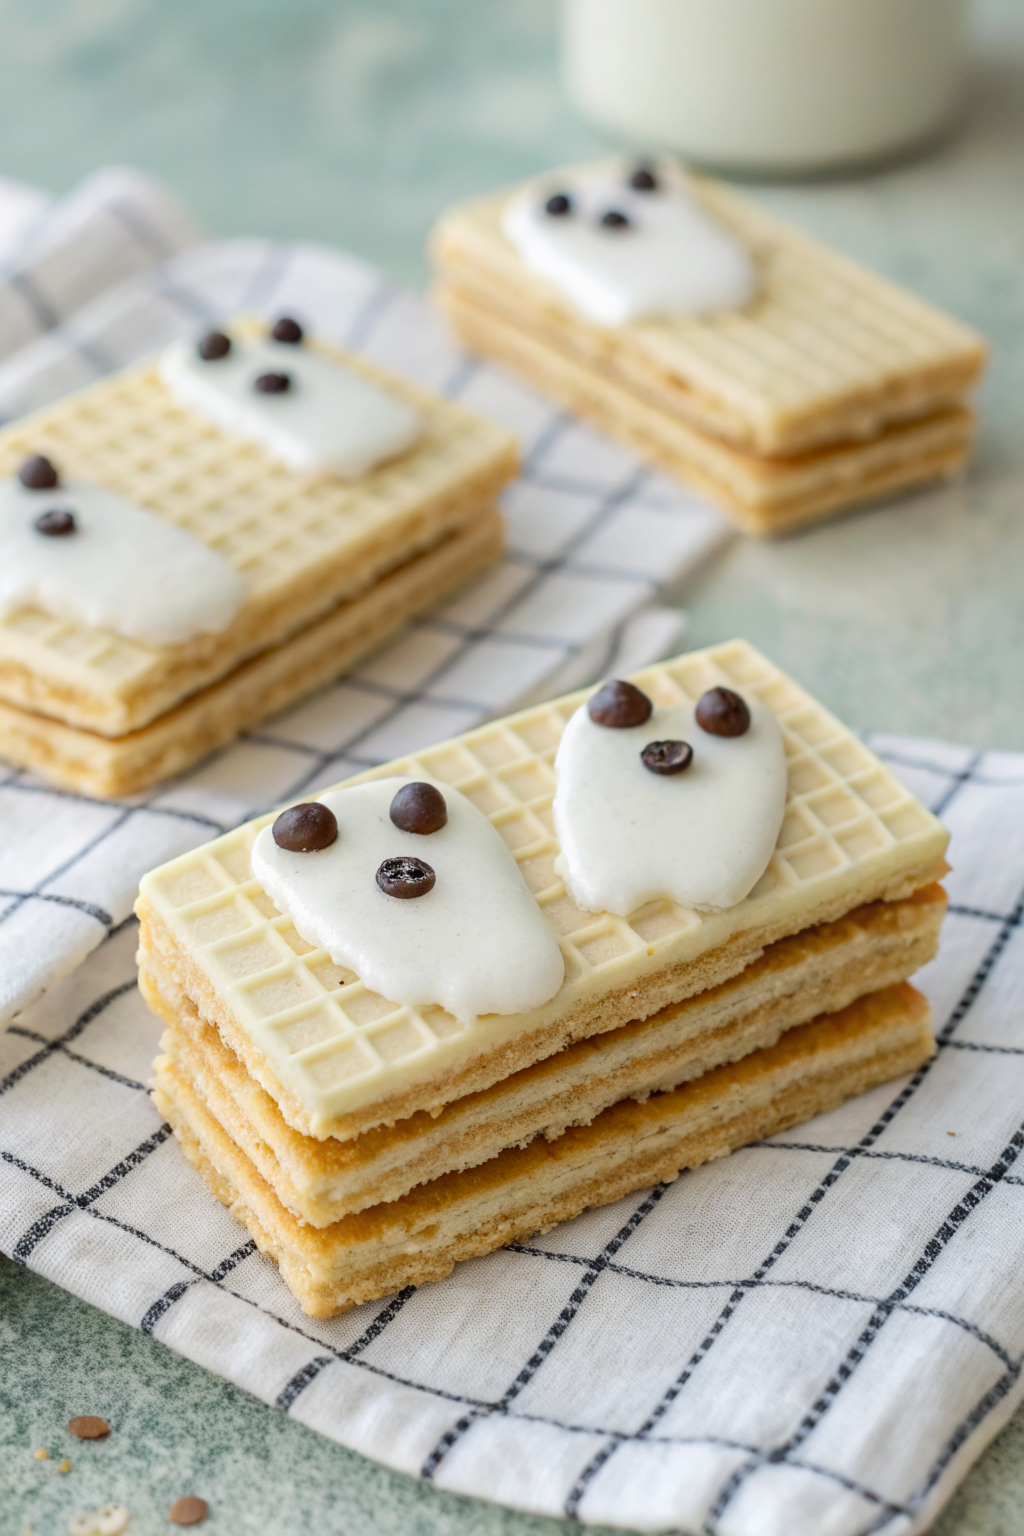
While the white coating still feels soft, press two mini chocolate chips near the top of each cookie for eyes.
Add a third chip or a chocolate sprinkle below the eyes for a mouth.
If you use candy eyes, press them in gently and add a tiny chocolate sprinkle or dot of melted chocolate for the mouth.
Step 5: Chill and set
Place the baking sheet in the fridge for 10–15 minutes so the chocolate firms up.
Check one cookie; if the coating feels firm and dry, pull the tray out.
Keep the cookies on the parchment until you finish any extra decorating.
Step 6: Pipe details with melted chocolate
Melt dark or milk chocolate in a small bowl using the same short-burst method.
Transfer melted chocolate to a small piping bag or a zip-top bag and snip a tiny corner.
Pipe little ovals for eyes, open “O” mouths, or squiggly arms on the sides of the ghosts, and use a toothpick to clean up any wobbly lines.
Step 7: Add final spooky touches
Sprinkle a few Halloween sprinkles around the base of the ghosts while the chocolate details still feel soft.
Add tiny eyebrows or eyelashes with the piping bag if you want extra personality.
Chill again for 5–10 minutes to set the final decorations, then gently peel each ghost off the parchment.
Recipe Variations
- Gluten-free: Use gluten-free vanilla wafer cookies or gluten-free shortbread fingers and check that your white chocolate chips list gluten-free on the label.
- Vegan: Choose vegan vanilla cookies, dairy-free white chips, and dark chocolate that uses no milk solids.
- Low sugar: Use sugar-free vanilla cookies and sugar-free white chocolate, and keep decorations minimal.
- Extra crunch: Sprinkle crushed pretzels, toasted coconut, or chopped nuts over the wet chocolate at the base of each ghost.
- Flavor twist: Stir a tiny drop of almond, orange, or peppermint extract into the melted white chocolate.
- Colorful ghosts: Tint a portion of the white chocolate with gel food coloring and make pastel or neon ghosts for a playful tray.
Ways to Serve Chocolate Dipped Ghost Wafer Cookies Recipe
- Arrange ghosts standing upright in crushed chocolate cookies “dirt” for a mini graveyard platter.
- Pack a few ghosts in clear treat bags with ribbon for classroom parties or neighbor gifts.
- Serve on a dessert board with caramel apples, popcorn balls, and fresh fruit for a Halloween snack spread.
- Tuck one or two ghosts on top of cupcakes or frosted brownies as edible toppers.
- Add them to lunchboxes as a surprise October treat.
Storage Success
Store Chocolate Dipped Ghost Wafer Cookies in an airtight container at room temperature for up to 5 days. Keep layers separated with parchment paper so the faces stay neat and the chocolate coating does not smudge. Avoid direct sunlight or warm spots so the chocolate does not soften or bloom. If your kitchen runs warm, chill the cookies, then bring them out about 10 minutes before serving so the chocolate tastes smooth again.
Chocolate Dipped Ghost Wafer Cookies Recipe
Ingredients
Instructions
- Line a baking sheet with parchment paper or a silicone mat. Arrange the vanilla wafer cookies in a single layer near the baking sheet. Place mini chocolate chips, sprinkles, and any candy decorations into small bowls for easy access.
- Place the white chocolate chips or candy melts in a microwave-safe bowl. Microwave on 50% power in 20–30 second bursts, stirring well after each burst, until mostly melted and smooth.
- Stir in 1 teaspoon of neutral oil until the chocolate flows easily. Add up to 1 more teaspoon of oil if the mixture still feels too thick for dipping.
- Working with one cookie at a time, hold a vanilla wafer over the bowl and either dip it fully or spoon melted white chocolate over it to coat. Use a fork to lift the cookie, gently tap the fork on the bowl edge to remove excess chocolate, and scrape the bottom of the fork on the rim.
- Lay the coated cookie on the prepared baking sheet. Use the back of a spoon or a toothpick to nudge the chocolate at the bottom into a soft, wavy edge so the cookie looks like a ghost draped in a sheet.
- While the white coating is still soft, press two mini chocolate chips near the top of each cookie for eyes. Add a third chip or a chocolate sprinkle below them for a mouth, or place candy eyes and a small sprinkle or chocolate dot for the mouth.
- Transfer the baking sheet to the refrigerator and chill for 10–15 minutes, or until the white chocolate coating feels firm and dry to the touch.
- Melt the dark or milk chocolate in a small bowl using the same short-burst microwave method. Transfer to a small piping bag or zip-top bag and snip a tiny corner.
- Pipe details such as ovals for eyes, open “O” mouths, or squiggly arms on the sides of the ghosts. Use a toothpick to tidy up any wobbly lines or extra chocolate if needed.
- While the piped chocolate is still soft, add Halloween sprinkles around the base of each ghost for extra color, and, if desired, pipe tiny eyebrows or eyelashes for personality.
- Chill the cookies again for 5–10 minutes, until all decorations are set. Gently peel each ghost cookie off the parchment and serve or store.
Notes
Approximate per cookie (1 of 24): 110 calories; fat 6 g; saturated fat 3.5 g; carbohydrates 14 g; fiber 0 g; sugars 10 g; protein 1 g; sodium 60 mg. Values will vary based on specific cookie brand, chocolate type, decorations, and portion size.
Leave a Reply