
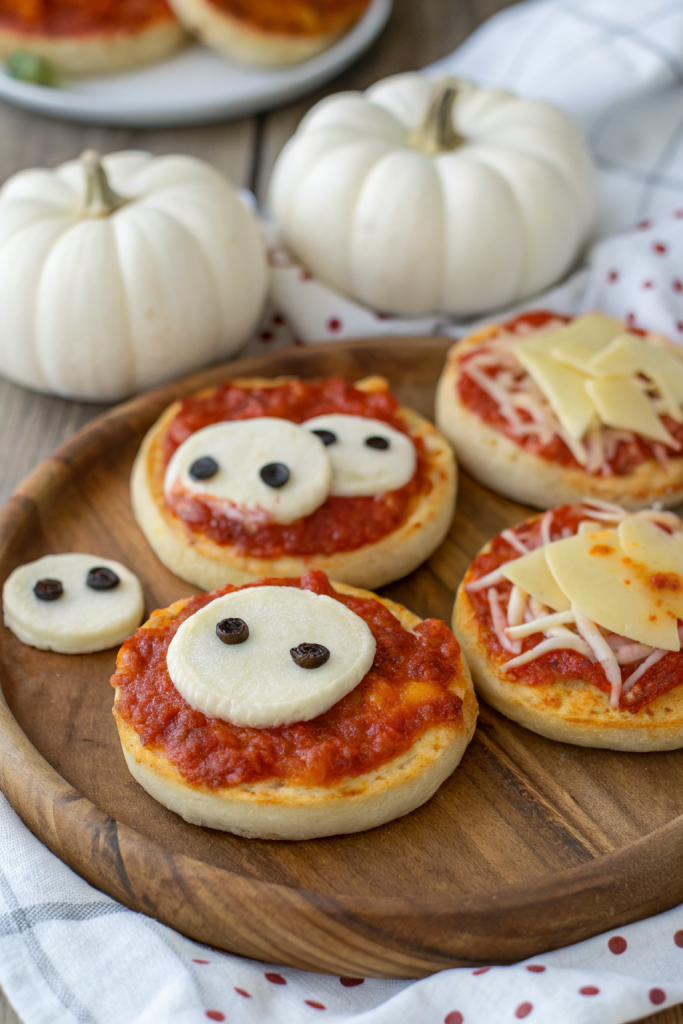
Easy Mini Halloween Pizzas Recipe tastes cheesy, toasty, and just spooky enough to make kids giggle and adults steal seconds, and you can pull the whole thing off in about 25 minutes. This works perfectly for busy parents, Halloween parties, or anyone who wants a fun appetizer without kneading dough or stressing over yeast. I tested these with my own kids and they inhaled three each before I could photograph them.
Why Make This Easy Mini Halloween Pizzas Recipe at Home
You control the toppings, the cheese, and the level of “spooky” so picky eaters still feel safe and adventurous eaters still feel excited. You also save money by using pantry shortcuts like jarred sauce and English muffins or tortillas instead of fresh dough.
Kids love to help cut out ghost cheese or olive spider legs, so this turns into a built-in activity before trick-or-treating. You also avoid long delivery waits on the busiest pizza night of the year and still serve something hot and fun.
“These Easy Mini Halloween Pizzas vanished from the tray in minutes and my kids asked for them again the next night ★★★★★”
Ingredients You Need
Base options
Use any of these for the mini pizza crusts:
- English muffins, split (my favorite, they crisp nicely and hold toppings well)
- Mini naan or pita rounds
- Small flour tortillas, cut into 3 to 4 inch circles
- Canned biscuit dough, flattened into small rounds and baked 5 to 6 minutes before topping
Sauce
- 1 to 1½ cups pizza sauce or marinara
- Use jarred sauce to save time. I like Rao’s or Classico for good flavor.
- Stir in a pinch of dried oregano, basil, or crushed red pepper if you want extra flavor.
Cheese
- 2 cups shredded low moisture mozzarella
- 4 to 6 slices mozzarella or provolone for ghost shapes
- Optional: a little cheddar or Colby Jack for “pumpkin” faces
Tips on cheese:
- Use pre-shredded mozzarella if you want speed.
- Use block cheese if you want better melt and stretch.
Toppings for Halloween faces
Mix and match these to build pumpkins, ghosts, mummies, and spiders:
- Black olives, sliced (perfect for spider bodies and eyes)
- Mini pepperoni or regular pepperoni cut into small shapes
- Bell peppers, thinly sliced (green for stems, red or yellow for mouths)
- Mushrooms, thinly sliced
- Red onion, thinly sliced
- Cherry tomatoes, sliced
- Fresh basil or parsley, chopped, for a sprinkle of color
Seasoning
- Olive oil
- Kosher salt
- Freshly ground black pepper
- Dried oregano or Italian seasoning
- Garlic powder (great shortcut for extra flavor)
Equipment
- Baking sheet or two large sheet pans
- Parchment paper or a silicone baking mat
- Small cookie cutters or a paring knife for ghost and pumpkin shapes
- Cutting board and knife
- Small bowls for toppings so kids can “decorate” easily
Tips & Mistakes
- Pre-toast soft bases like English muffins or tortillas for 3 to 5 minutes so they stay crisp under the sauce.
- Do not overload each mini pizza with sauce or toppings or the centers turn soggy.
- Cut cheese slices into ghosts or mummies while the oven preheats so you avoid last-minute stress.
- Use olives and peppers for eyes and mouths instead of tiny bits of meat that slide off easily.
- Bake on parchment so cheese that melts over the edge cleans up easily.
- Rotate the pan halfway through baking if your oven heats unevenly so every mini pizza browns nicely.
- Let kids decorate their own pizzas but keep a “no raw meat” rule for them and handle any sausage or bacon yourself.
- Cool the pizzas 3 to 5 minutes before serving so cheese sets slightly and faces stay in place.
How to Make Easy Mini Halloween Pizzas Recipe
Step 1: Prep the bases and toppings
Preheat your oven to 400°F and line a baking sheet with parchment. Split English muffins or arrange your chosen bases in a single layer. Brush the tops lightly with olive oil and sprinkle with a pinch of garlic powder and salt.
Toast the bases in the oven for 3 to 5 minutes until they feel slightly crisp on top. While they toast, slice olives, peppers, onions, and any other toppings into tiny “face” pieces. Cut cheese slices into ghosts, mummies, or pumpkins using a small cookie cutter or a sharp paring knife.
Step 2: Sauce and cheese
Remove the toasted bases from the oven and reduce heat to 375°F. Spread 1 to 2 tablespoons of pizza sauce on each base, leaving a small border around the edge. Sprinkle shredded mozzarella over most of them to make classic mini pizzas.
On a few bases, place your ghost or pumpkin cheese shapes instead of shredded cheese. Season lightly with dried oregano or Italian seasoning and a little black pepper. Keep toppings in small bowls nearby so you can decorate quickly.
Step 3: Decorate spooky faces
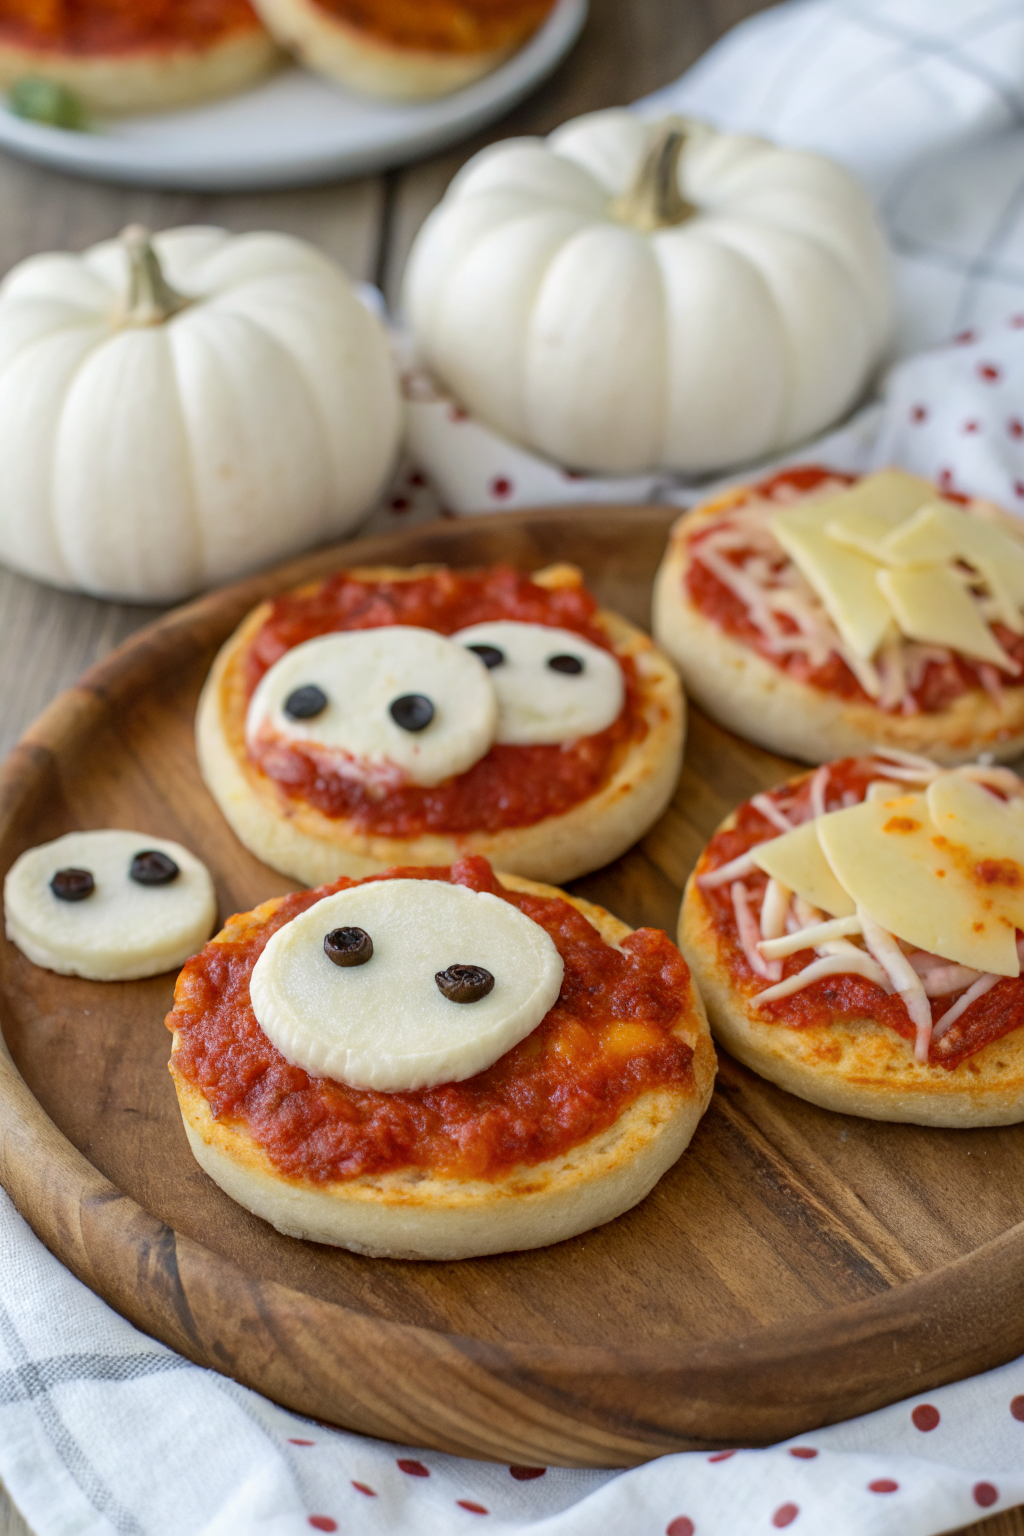
Build “pumpkin” pizzas by using cheddar or orange-tinted cheese on top, then add olive or pepper pieces for eyes, nose, and a jagged mouth. Add a small strip of green pepper at the top as a stem. Make “ghost” pizzas by laying a ghost-shaped slice of mozzarella on a sauced base and adding two tiny olive pieces for eyes.
For “mummy” pizzas, lay thin strips of mozzarella across the sauce like bandages and tuck in two olive slices for eyes. For “spider” pizzas, place a whole olive half as the body and use thin olive strips as legs. Have fun with it and keep the toppings fairly flat so they bake evenly.
Step 4: Bake
Return the decorated mini Halloween pizzas to the oven. Bake at 375°F for 8 to 10 minutes until the cheese melts and the edges of the bases turn golden. If you like extra browning, switch to broil for 1 to 2 minutes and watch closely.
Remove the pan from the oven and let the pizzas rest 3 to 5 minutes. This short rest helps the cheese set so faces stay recognizable instead of sliding off. Transfer to a platter and serve warm.
Variations I've Tried
I make a “monster veggie” version with extra sauce, mushrooms, bell peppers, and onions, then add olive eyes and a crooked pepper smile. Kids who claim they hate vegetables still eat these because the faces look silly. I also make a “meat lover” version with mini pepperoni, cooked crumbled sausage, and extra cheese.
For a lighter option, I use small whole wheat pitas and part-skim mozzarella. I also tried a gluten free version with gluten free English muffins and it worked nicely, just toast them a bit longer before topping. If you want a dairy free version, use your favorite vegan cheese and check that your base and sauce stay dairy free.
How to Serve Easy Mini Halloween Pizzas Recipe
Serve these mini Halloween pizzas on a big platter and group them by character so kids can “choose a ghost” or “pick a pumpkin.” Add a big bowl of carrot sticks, cucumber slices, and ranch or hummus so you balance the cheese with some crunch. Pair the pizzas with apple slices and a simple green salad for a more filling meal.
Offer fun drinks like sparkling water with orange slices or apple cider in clear cups so the colors match the Halloween vibe. If you host a party, keep a batch in the oven and refresh the platter every 10 minutes so guests always find hot, melty pizzas.
How to store
- Cool leftover mini pizzas completely on a rack so steam does not make the bottoms soggy.
- Store in an airtight container in the fridge for up to 3 days.
- Freeze on a baking sheet until solid, then move to a freezer bag and keep up to 2 months.
- Reheat from the fridge in a 375°F oven or toaster oven for 6 to 8 minutes until hot and crisp.
- Reheat from frozen at 350°F for 12 to 15 minutes, or until the cheese melts and the centers heat through.
- Avoid the microwave if you want crisp crusts; use it only for quick kid snacks and expect softer results.
Easy Mini Halloween Pizzas Recipe
Ingredients
Instructions
- Preheat the oven to 400°F (200°C) and line a baking sheet with parchment paper.
- Arrange the English muffin halves or other chosen bases in a single layer on the baking sheet. Brush the tops lightly with olive oil and sprinkle with garlic powder and kosher salt.
- Toast the bases in the oven for 3 to 5 minutes, until they feel slightly crisp on top.
- While the bases toast, slice olives, peppers, onions, mushrooms, and any other toppings into small pieces for “faces.” Cut cheese slices into ghosts, mummies, or pumpkin shapes using a small cookie cutter or a sharp paring knife.
- Reduce the oven temperature to 375°F (190°C).
- Spread 1 to 2 tablespoons of pizza sauce over each toasted base, leaving a small border around the edge.
- Sprinkle shredded mozzarella over most of the bases to make classic mini pizzas. On some, place your ghost or pumpkin cheese shapes instead of shredded cheese. Season lightly with dried oregano or Italian seasoning and black pepper.
- For pumpkin pizzas, use cheddar or orange-tinted cheese on top, then add olive or pepper pieces for eyes, nose, and a jagged mouth. Add a small strip of green pepper at the top as a stem.
- For ghost pizzas, lay a ghost-shaped slice of mozzarella on a sauced base and add two tiny olive pieces for eyes.
- For mummy pizzas, lay thin strips of mozzarella across the sauce like bandages and tuck in two olive slices for eyes.
- For spider pizzas, place an olive half as the body and use thin olive strips as legs. Keep toppings fairly flat so they bake evenly.
- Return the decorated mini pizzas to the oven and bake at 375°F (190°C) for 8 to 10 minutes, until the cheese is melted and the edges are golden.
- If you like extra browning, switch the oven to broil for 1 to 2 minutes, watching closely so they don’t burn.
- Let the pizzas rest on the pan for 3 to 5 minutes so the cheese sets and the faces stay in place. Transfer to a platter and serve warm.
Notes
Approximate per mini pizza (1 of 12), made with English muffins, mozzarella, pizza sauce, and mixed vegetable/olive toppings: 160–190 calories; fat 8–10 g; saturated fat 3–4 g; carbohydrates 16–20 g; fiber 1–2 g; sugars 2–4 g; protein 7–9 g; sodium 320–420 mg. Values will vary based on the base used, cheese type and amount, toppings, and portion size.
Leave a Reply