
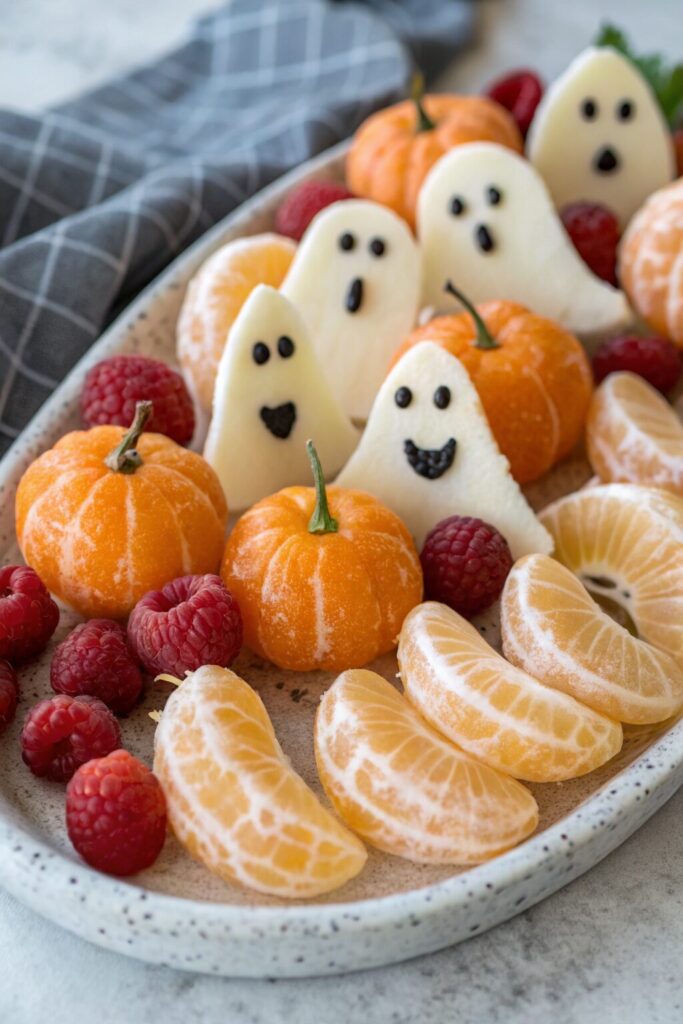
Healthy Halloween Snack Ideas hit that sweet-and-salty spot with fun crunch, bright colors, and just enough spooky flair to keep kids excited and adults happy about the nutrition. They work best for busy parents, party hosts, or anyone who wants festive snacks in under an hour without a sugar hangover. I test these every October with my own friends and neighbors, and the veggie trays always disappear faster than the candy.
Why You Should Try This Healthy Halloween Snack Ideas
These Healthy Halloween Snack Ideas keep the fun of the holiday while cutting way back on artificial colors and heavy sugar. You still get cute ghosts, pumpkins, and monsters, just made from fruit, veggies, yogurt, and whole grains instead of candy bars.
They also fit a wide range of diets, which helps when you host a party with kids and adults who all eat differently. You can build most of these snacks with simple pantry staples and a quick grocery run, and kids can help assemble them like a craft project.
“These Healthy Halloween Snack Ideas vanished from the party table before the candy bowl even made it out of the kitchen, and everyone asked for the recipes. ★★★★★”
Ingredients You’ll Need
Below you will find a mix-and-match list so you can build several Healthy Halloween Snack Ideas from one shopping trip. I include easy swaps, budget shortcuts, and a few brand notes where they actually matter.
Produce
- Clementines or tangerines
- Peel easily and look like mini pumpkins.
- Bananas
- Use just-ripe bananas so they hold shape for ghost pops.
- Apples (Honeycrisp, Gala, or Granny Smith)
- Crisp apples work best for “monster mouths.”
- Strawberries
- Great for “bloody” monster eyes with a little yogurt.
- Seedless grapes (green and red)
- Perfect for “eyeballs” or “witch fingers.”
- Baby carrots
- Celery sticks
- English cucumber
- Holds moisture well and slices cleanly for “monster faces.”
- Cherry or grape tomatoes
- Bell peppers (orange, red, green)
- Orange peppers make excellent jack-o’-lantern cups.
- Black olives
- Use sliced olives for eyes and spiders.
- Avocados
- Mash for a “cauldron” of green dip.
- Lemon or lime
- Squeeze over cut apples to slow browning.
Dairy & Refrigerated
- Greek yogurt, plain or vanilla
- Thick yogurt pipes nicely for ghost faces and spider webs.
- String cheese or mozzarella sticks
- Slice into “witch fingers” or “mummy wraps.”
- Shredded cheese (cheddar or Mexican blend)
- Sprinkle on stuffed peppers or mini quesadillas.
- Hummus (store bought works great)
- Classic or roasted red pepper for a spooky orange color.
- Cream cheese or whipped cream cheese
- Use as edible “glue” for eyes and decorations.
Pantry Staples
- Whole grain crackers or tortilla chips
- Choose sturdy ones for dipping into guac or hummus.
- Whole wheat tortillas
- Cut into shapes for baked chips or mummy quesadillas.
- Rolled oats
- Use in no-bake “monster” energy bites.
- Nut butter or seed butter
- Peanut, almond, or sunflower butter all work.
- Dark chocolate chips or mini chips
- Use as eyes and mouths in small amounts.
- Raisins or dried cranberries
- Great for eyes, “blood” details, and texture.
- Pretzel sticks
- Turn into broom handles, spider legs, or skeleton ribs.
- Popcorn kernels or plain bagged popcorn
- Air pop or choose a lightly salted brand.
- Honey or maple syrup
- Lightly sweeten energy bites or yogurt.
- Vanilla extract
- Adds flavor to yogurt dips and bites.
Fun Extras & Decorations
- Candy eyeballs (optional)
- Use sparingly for a fun look; you can also use mini chocolate chips.
- Natural food coloring (green, orange, purple)
- Tint yogurt or cream cheese without artificial dyes.
- Pumpkin seeds or pepitas
- Sprinkle over salads or use as “monster teeth.”
Equipment List
- Sharp chef’s knife and small paring knife
- Cutting board
- Mixing bowls (medium and large)
- Baking sheet and parchment paper
- Small cookie cutters (pumpkin, bat, ghost shapes)
- Toothpicks or small skewers
- Piping bag or zip-top bag with a tiny corner cut off
- Blender or food processor for dips and energy bites
- Small serving cups, ramekins, or mini mason jars
Tips & Tricks
- Slice apples last and toss them with lemon or lime juice to keep them from browning on the snack table.
- Prep a big batch of cut veggies and fruit in the morning, then assemble the spooky shapes right before guests arrive.
- Use cream cheese or thick yogurt as “glue” to stick eyes, teeth, and decorations onto fruit and crackers.
- Keep a small bowl of candy eyeballs or mini chocolate chips nearby so kids can decorate their own monster snacks.
- Stick to 2 or 3 snack ideas for a small gathering so you do not overload yourself with prep.
- Lay parchment on trays before you build anything sticky so cleanup stays easy.
- Use store bought hummus and guacamole if you feel short on time; focus your energy on fun shapes and faces.
- Cut string cheese and veggies into simple shapes instead of detailed carvings; kids care more about faces than perfection.
- Chill yogurt-based snacks for at least 15 minutes so faces and designs hold shape.
- Label platters with fun names like “Monster Mouths” or “Ghostly Banana Pops” to pull kids toward the healthier options first.
How to Make Healthy Halloween Snack Ideas
Below you will find step-by-step ideas for several Healthy Halloween Snack Ideas. You can pick just one or two, or set up a full snack board.
Step 1: Make Clementine “Pumpkins” and Banana “Ghosts”
Peel clementines and leave them whole so they look like tiny pumpkins. Slice celery into short, thin sticks and press one piece into the top center of each clementine as a “stem.” Arrange them on a platter.
Peel bananas and slice them in half crosswise. Stand each half cut side down on a plate. Press mini chocolate chips or raisins into the banana to form two eyes and a small “O” mouth, then chill the plate so the faces stay put.
Step 2: Build Apple “Monster Mouths”
Slice apples into thick wedges and toss them lightly with lemon or lime juice. Spread a thin layer of nut butter or seed butter on one side of each wedge. Sandwich two wedges together with the nut butter facing inward so they look like an open mouth.
Press sunflower seeds or pumpkin seeds along the front edge to look like teeth. Add a small dab of nut butter on top of the apple and stick on a candy eye or mini chocolate chip eye. Chill until serving so the “mouths” hold together.
Step 3: Mix No-Bake Monster Energy Bites
In a mixing bowl, stir together rolled oats, nut or seed butter, honey or maple syrup, a splash of vanilla, and a pinch of salt. Add mini chocolate chips or chopped dried fruit. Stir until the mixture feels sticky and holds together when you squeeze it.
Roll the mixture into small balls and place them on a parchment lined baking sheet. Press one or two candy eyes or mini chocolate chips into each ball to make “monster” faces. Chill for at least 20 minutes to firm up.
Step 4: Prep Veggie Skeleton Platter
Slice cucumbers, bell peppers, celery, and carrots into sticks and rounds. Place a bowl of hummus at the top of a large platter as the “head.” Use sliced olives and a bit of hummus to form eyes and a mouth on the surface of the dip.
Arrange cucumber slices as the neck and spine, then line up carrot and celery sticks as arms and legs. Use bell pepper strips as ribs and cherry tomatoes or grapes as joints and hands. Fill in gaps with extra veggies so the skeleton looks full and colorful.
Step 5: Stuff Jack-o’-Lantern Bell Peppers
Slice the tops off orange bell peppers and remove seeds and membranes. Use a small paring knife to cut triangle eyes and a jagged mouth into one side of each pepper, just like a mini jack-o’-lantern. Fill the peppers with guacamole, hummus, or a mix of black beans, corn, and salsa.
Sprinkle a little shredded cheese on top if you like. Place the tops back on slightly askew so the filling peeks out. Chill until serving, then serve with whole grain crackers or veggie sticks for dipping.
Step 6: Bake Mummy Quesadillas
Cut whole wheat tortillas into small circles or fun shapes with cookie cutters. Spread a thin layer of refried beans or mashed black beans on half of the shapes, then sprinkle with a little shredded cheese. Top with another tortilla shape to form mini quesadillas.
Use thin strips of tortilla to lay across the top like mummy bandages. Bake on a parchment lined sheet at 375°F until the cheese melts and the edges crisp, about 6 to 8 minutes. Add two tiny dots of sour cream or yogurt and press on olive slices or mini chips as eyes.
Step 7: Spin a Spider Web Veggie Dip
Spread hummus or Greek yogurt dip in a shallow dish. Spoon a few tablespoons of plain Greek yogurt or sour cream into a small zip-top bag and snip a tiny corner. Pipe concentric circles over the surface of the dip.
Drag a toothpick from the center outward to the edge several times to create a web pattern. Place a black olive “spider” on top by cutting one olive in half for the body and another into thin strips for legs. Serve with carrot sticks, cucumber slices, and whole grain crackers.
Step 8: Build a Popcorn “Cauldron”
Pop popcorn and toss it lightly with a drizzle of olive oil and a pinch of salt. Add a handful of pumpkin seeds and a few dark chocolate chips for color and crunch. Spoon the mixture into a large black bowl or Dutch oven so it looks like a bubbling cauldron.
Top with a few candy eyes or mini chocolate chips for a spooky touch. Set small cups nearby so guests can scoop their own portions. This snack gives everyone a salty, crunchy option that still feels lighter than chips.
What to Serve with Healthy Halloween Snack Ideas
These Healthy Halloween Snack Ideas pair nicely with big pitchers of fruit infused water, such as orange slices with cinnamon sticks or green apple slices with cucumber. You can also serve warm apple cider, either plain or with a cinnamon stick in each mug. If you want something creamy, blend a pumpkin smoothie with banana, yogurt, and a touch of maple syrup and serve it in clear cups with silly faces drawn on them.
Round out the table with a simple green salad topped with pumpkin seeds and dried cranberries for a nod to fall flavors. If kids need something more filling, add a tray of turkey or veggie roll ups so the snacks can double as a light meal.
Storage Options
- Store cut fruits like apples and bananas in airtight containers in the fridge for up to 1 day; add lemon or lime juice to slow browning.
- Keep veggie platters and hummus or yogurt dips covered in the fridge for up to 3 days, and add decorative eyes and faces right before serving.
- Refrigerate no-bake monster energy bites in a sealed container for up to 1 week, or freeze them for up to 2 months.
- Store popcorn snacks in an airtight container at room temperature for up to 2 days, and refresh them in a low oven for a few minutes if they soften.
- Rebuild any soggy cracker based snacks right before serving, since crackers taste best when you keep toppings separate until party time.
Leave a Reply